As many of you know, I blew out a disc this summer while lifting Brexton. He was in the middle of the bed where I was dressing him and when he began to fuss, I leaned over with my arms outstretched and lifted him using just my back (aka completely the wrong way)! As someone who lives in the gym, I know all about proper form. However, tired from lack of sleep and anxious to soothe my crying baby, my common sense went out the window. I instantly felt a stabbing pain and basically crawled around for the next three days.
It felt a little bit better as the days went on so I began to resume my normal workouts, writing it off as a pulled muscle. I noticed though, over the following weeks, that sitting and lying in bed were becoming increasingly difficult, as was holding Brexton. It got to the point where I couldn’t really roll myself over in bed and I definitely couldn’t get Brexton in and out of his crib without experiencing excruciating pain. I tried to wait until the off-season to seek medical attention but finally caved after the October Charlotte race. I had lost all feeling in my left hip, glute and leg and was increasingly dragging my left foot. I ended up going to the doctor the next morning where they found that I had indeed blown out a chunk of my disc in my lower back and it was pressing on the nerve, hence the pain. When an injection into the area offered no relief, surgery was set for the following week.
The surgery went great and I instantly awoke with no pain shooting down my leg…what a relief! My low back was sore for a few weeks and now all I have is a little 1/2 inch scar. I took my daily physical routines slowly, just starting out with walking around the house, then the block, increasing the distance over the next few weeks. The very worst part of the whole experience was that I was not allowed to hold Brexton for six weeks! It was beyond miserable hearing him cry and not being able to pick him up out of his crib myself. I followed the doctor’s orders though and right before the Homestead race, I was cleared to begin working out again and, most importantly, I could hold my precious baby!
During my recovery, I had the best physical therapist named Ken Breath, PT, ATC from OrthoCarolina. He was Kyle’s physical therapist after his accident and, if he could get Kyle back to racing after a shattered left foot and a broken tib/fib in the right leg, I knew I was in great hands. We started out slowly with walking, pelvic tilts and hip bridges. As I got stronger, it was important to keep working my core. Below are the five exercises Ken had me do during my recovery that I still do today. Even though I feel great, I still don’t do a lot of twisting, jumping or lifting of heavy weights. Ken and I especially like these five moves because they really work your core without putting a lot of stress on your lower back. I have ordered them in what I believe is the easiest movement to the hardest movement:
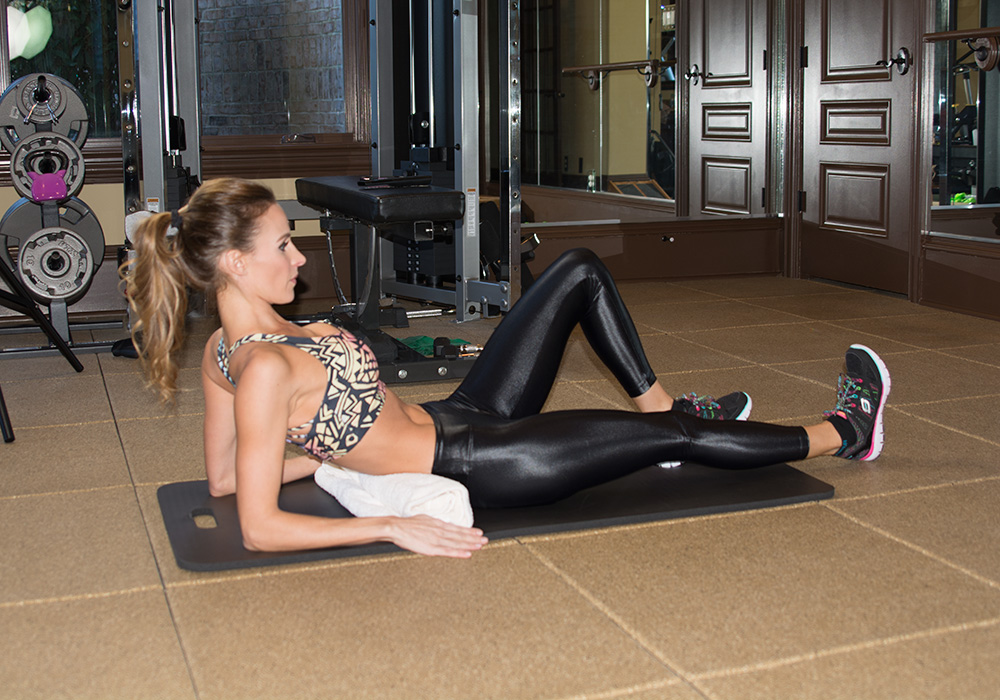
- Heel Slides: Starting with a towel rolled up behind your lower back for extra support, lean back onto the towel and place your feet flat on the floor (make sure you’re comfortable before you start). Maintaining your heel on the floor the whole time, slide one leg out until it is straight and then bring it back to the starting position and repeat on the opposite side. (It’s probably easier to do these without shoes for a better slide.)
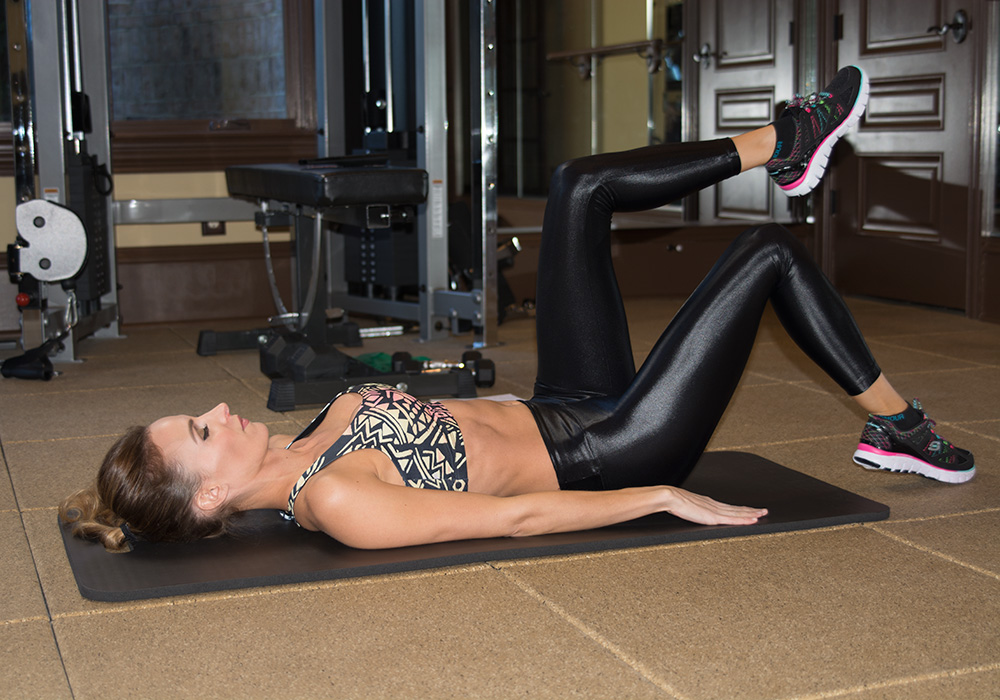
- Pilates Toe Taps: Start with your legs at a 90 degree angle (like a tabletop), back pressed into the mat, keeping your core tight. Keeping the legs in this “tabletop” position, slowly lower one foot towards the floor as you inhale, as you exhale raise that leg to the starting position. Repeat on the next side and continue alternating.
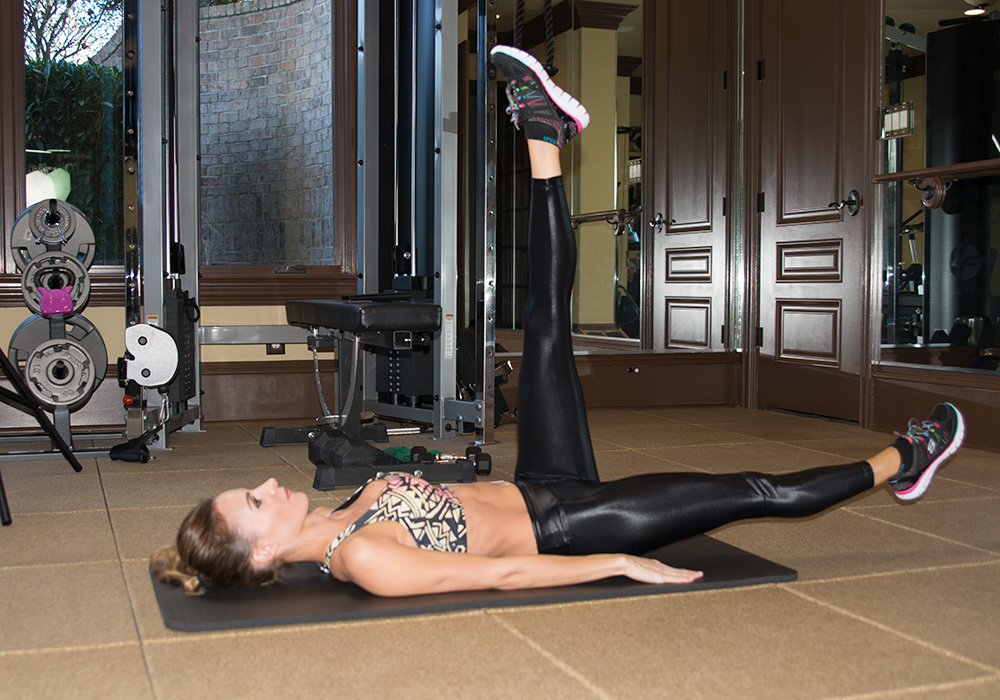
- Single Leg Drops: Start by lying on the mat, toes pointed towards the ceiling, back pressed into the mat with your core tight. Slowly lower one leg towards the ground, hovering just a few inches from it, and then slowly raise it back up and repeat on the other side. Only go as low as comfortable for you or, keep this in mind: when your lower back starts to leave the mat, don’t go any lower. I also aim to keep a straight leg but if you’re starting out with a slight bend, that’s fine too.
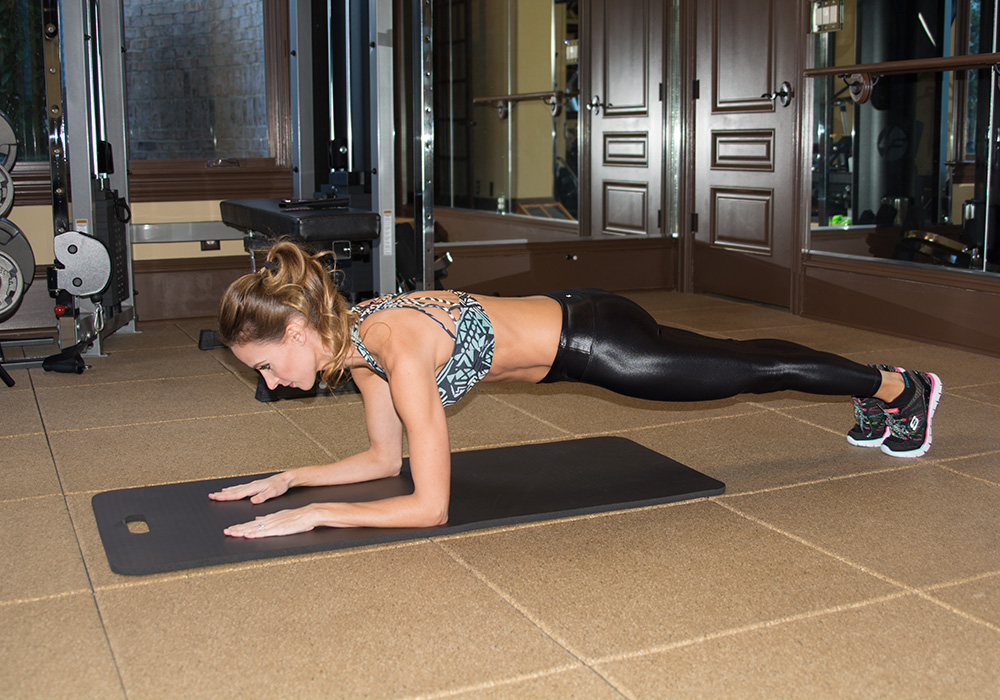
- Plank: Facing downwards, rest your forearms on the mat and extend your legs back so you are on your toes. Your elbows should be directly below your shoulders and your body should be a straight line. Key points to remember with these are to engage your core (really focusing on sucking your belly into your spine), don’t hike your booty into the air and remember to breathe.
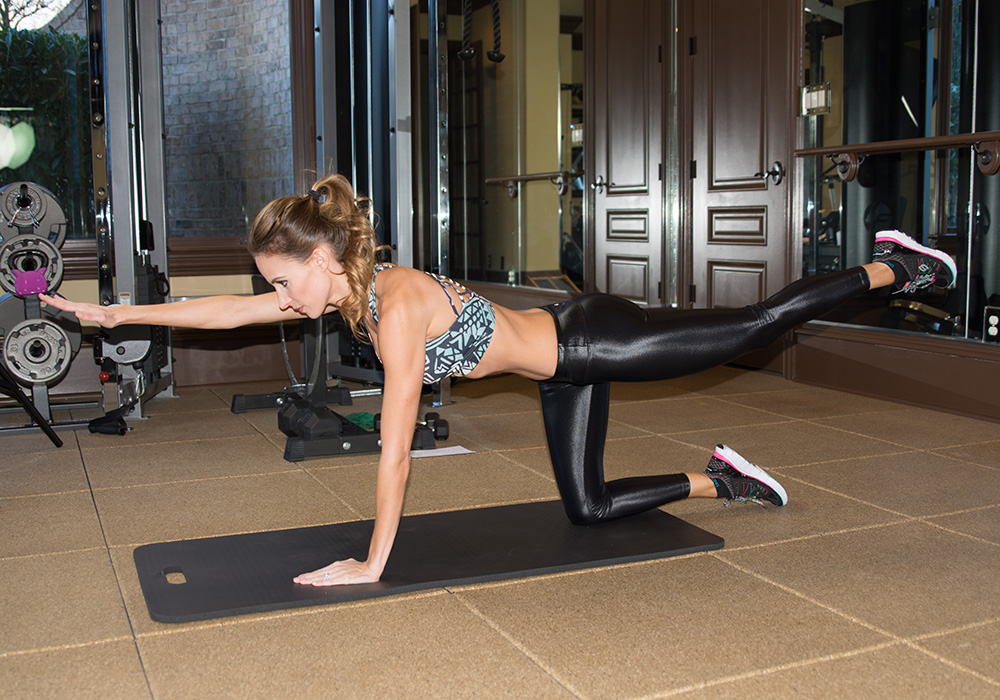
- Alternating Arm and Leg Raise: Begin on all fours and engage your core. Extend your arm straight out while at the same time raising your leg so that both are parallel with the floor. Hold for a beat and then return to the starting position. Repeat the movement with the opposite arm and leg. If you have a healthy back, you can always do the more advanced version where, after the parallel extension, you crunch your elbow and knee towards each other and then extend them back out. For this version, you would complete a number of reps before switching to the other arm and leg.
**Note: I started with doing just 10 of each movement and 20 seconds on the plank but, now that I’m stronger, I do each move for a full minute, two-three times!